Introduction
This tutorial demonstrates how to use the Mesh Export API to view an iModel as Cesium 3D Tiles in three.js. This is done using 3DTilesRendererJS, a package that allows you to render 3D Tiles in three.js.
You will learn the following:
- How to set up a basic three.js scene
- How to use the Mesh Export API to get a 3D Tiles tileset url
- How to load the tileset in three.js
To view the source code for the application built in this tutorial, see the 3d-tiles-samples GitHub repository.
Prerequisites
Ensure you meet the following requirements before starting the tutorial:
- Have the iTwin and iModel IDs of iModel you would like to view. You can create an iModel from a Bentley Sample by following the "Create an iTwin" section of the Get Started with the iTwin Platform tutorial.
- Register a single page application to get a client ID. See the "Register your Application" section of the Get Started with the iTwin Platform tutorial.
- Have Node.js (LTS version) installed on your machine.
1. Set up your application
This tutorial uses Vite and Typescript, but you can use Webpack or another build tool, and either Typescript or vanilla Javascript. Please read the three.js installation guide for the three.js prerequisites and basic project structure.
The example created in this tutorial uses this Vite guide and their vanilla-ts template, which works well in combination with the three.js docs.
1.1 Set up your Vite project
To start off, run this npm create command to initialize a new Vite project using the vanilla-ts template. This will create a new directory with the name imodel-threejs-tutorial and set up a basic Vite project with Typescript. Now cd into your new directory and run npm install.
npm create vite@latest imodel-threejs-tutorial -- --template vanilla-ts
cd imodel-threejs-tutorial
npm install
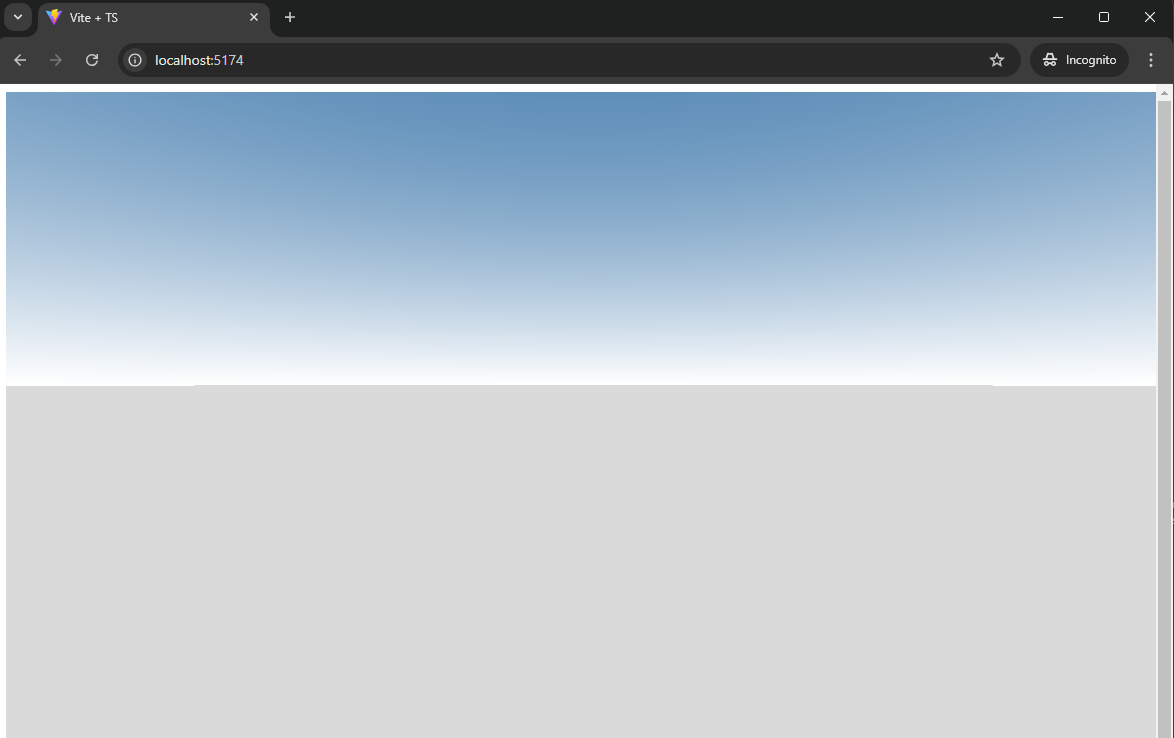
1.3 Start your application
Finally you can use the command npm run dev to start your application. This command runs a script configured in package.json that simply runs vite, which starts the Vite development server. Then navigate to http://localhost:5173 to view your application (which should just show some Vite boilerplate).
2. Create your three.js scene
2.1 Create a basic three.js scene
Add the following code to your main.ts file to import three.js and create a basic scene, camera, and renderer. You might want the camera in a different position depending on the size of your tileset.
import * as THREE from "three";

const scene = new THREE.Scene();
const camera = new THREE.PerspectiveCamera(75, window.innerWidth / window.innerHeight, 1, 100000);
camera.position.set(20, 6, 20);
const renderer = new THREE.WebGLRenderer();

renderer.setSize(window.innerWidth, window.innerHeight);
document.body.appendChild(renderer.domElement);
2.2 Add lights, controls, and a skybox
Now add the following code to main.ts to add some lights, controls, a skybox, and a render loop to the scene. At least one light is required to see the model in your scene, and adding both a hemisphere and directional light allow you to see basic shading. The controls are needed for navigating in the scene. The render loop, the function animate() is called every frame to actually render the scene on-screen.
import { OrbitControls } from "three/addons/controls/OrbitControls.js";
import { createSimpleSky } from "./sky";

// Add lighting and skybox
const directionalLight = new THREE.DirectionalLight(0xffffff, 2);
directionalLight.position.set(1, 1, 0);

const hemisphereTop = 0xffffff;
const hemisphereBottom = 0xaaaaaa;
const hermisphereIntensity = 2;
const hemisphereLight = new THREE.HemisphereLight(hemisphereTop, hemisphereBottom, hermisphereIntensity);
hemisphereLight.position.set(0, 1, 0);
scene.add(directionalLight, hemisphereLight);

const sky = createSimpleSky();
scene.add(sky);

const controls = new OrbitControls(camera, renderer.domElement);

function animate() {
	renderer.render(scene, camera);
}
renderer.setAnimationLoop(animate);
Additionally, create a new file called sky.ts. Add the following code, which contains a function createSimpleSky that returns a basic skybox made of a three.js sphere geometry.
import * as THREE from "three";

export function createSimpleSky() {
  const sky = new THREE.Mesh(
    new THREE.SphereGeometry(5000, 32, 15),
    new THREE.ShaderMaterial({
      uniforms: {
        topColor: { value: new THREE.Color(0x89b7d6) },
        bottomColor: { value: new THREE.Color(0xeeeeee) },
        horizonColor: { value: new THREE.Color(0xffffff) },
      },
      vertexShader: `
        varying vec3 vPosition;
        void main() {
          vPosition = position;
          gl_Position = projectionMatrix * modelViewMatrix * vec4(position, 1.0);
        }
      `,
      fragmentShader: `
        uniform vec3 topColor;
        uniform vec3 horizonColor;
        uniform vec3 bottomColor;
        varying vec3 vPosition;
        void main() {
          float heightFactor = normalize(vPosition).y;
          if (heightFactor > 0.0) {
            heightFactor = sin(heightFactor * ${Math.PI} / 2.0);
            heightFactor = sin(heightFactor * ${Math.PI} / 2.0);
            gl_FragColor = vec4(mix(horizonColor, topColor, max(heightFactor, 0.0)), 1.0);
          } else {
            gl_FragColor = vec4(bottomColor, 1.0);
          }
        }
      `,
      side: THREE.BackSide,
    })
  );

  return sky;
}
Your result at the end of this section should look like an empty view of a skybox with a gray ground, and you should be able to control the camera with the mouse.
2.3 Update your CSS and remove Vite template files
To make your viewer look a little nicer, replace the existing CSS from the Vite template in src/style.css with the following code, which simply removes the margin around it.
body {
  margin: 0;
}
Additionally, now that you have some actual three.js code, you can safely delete some of the files that were created when you ran the vite create command for your project template. Delete counter.ts and typescript.svg from your src/ directory. At this point it should only contain main.ts, sky.ts, style.css, and vite-env.d.ts.
3. Add iTwin authorization
To make requests to Mesh Export endpoints, you will need to provide an access token in the Authorization header. To obtain the access token, you need to register your app with the iTwin Platform to obtain a client ID. You can follow this tutorial to learn how to obtain a client ID for your application.
3.1 Install the iTwin browser authorization package
Once you have a client ID, you can install the @itwin/browser-authorization package with npm. You can learn more about this package and other iTwin authorization clients in their GitHub repository.
npm i @itwin/browser-authorization
3.2 Configure the authorization client in your app
Now add the following code, also to main.ts, to configure your authorization client and allow users to sign into the app.
import { BrowserAuthorizationClient } from "@itwin/browser-authorization";

const redirectUri = window.location.origin + window.location.pathname;

const authClient = new BrowserAuthorizationClient({
  authority: `https://ims.bentley.com`,
  clientId: import.meta.env.VITE_CLIENT_ID,
  scope: "itwin-platform",
  redirectUri,
  responseType: "code"
});

authClient.signInRedirect();
await authClient.handleSigninCallback();
This code assumes you have set the environment variable VITE_CLIENT_ID to your app's client ID in an .env file at your project's root directory.
Another important aspect is the redirectUri property of the auth client. This URI must be present in the redirect URIs setting where you created your app (in the same location where you got your client ID) on developer.bentley.com. For example, if you run your Vite development server on its default port 5173, http://localhost:5173/ must be a redirect URI in your app's settings.
Note: The authorization client is sensitive to the forward slash character
/in your redirect URI. If you encounter an invalid redirect URI error, try adding your URI both with and without the forward slash to your app's settings.
In the following step you will be using the auth client to get an access token.
4. Get your tileset.json from the Mesh Export API
4.1 Create a function to call the Mesh Export API
Now that you are able to authorize with the service, add the following code to a new file iModelTiles.ts to create a function that gets an export from the Mesh Export API.
export async function getIModel3dTilesUrl(iModelId: string, accessToken: string): Promise<URL | undefined> {
  const headers = {
    "Authorization": accessToken,
    "Accept": "application/vnd.bentley.itwin-platform.v1+json",
    "Content-Type": "application/json",
    "Prefer": "return=representation"
  };

  const url = `https://api.bentley.com/mesh-export/?iModelId=${iModelId}&exportType=3DTILES`;

  const response = await fetch(url, { headers });
  const responseJson = await response.json();
  if (responseJson.error) {
    throw new Error(responseJson.error);
  }

  // Get the first export from the response, if it exists
  const exportItem = responseJson.exports.shift();
  if (exportItem) {
    const tilesetUrl = new URL(exportItem._links.mesh.href);
    tilesetUrl.pathname = tilesetUrl.pathname + "/tileset.json";
    return tilesetUrl;
  }
}
This function uses the get exports endpoint to get a list of exports in the 3D Tiles format. The export exportItem, contains a _links.mesh.href property which is the URL to the base path in Azure Storage that contains the tileset.json and its tiles. It's necessary to add the string "tileset.json" to the URL pathname to form it correctly.
4.2 Obtain your tileset.json
Now call this function in main.ts with the following code.
const iModelId = import.meta.env.VITE_IMODEL_ID;

const accessToken = await authClient.getAccessToken();
const tilesetUrl = await getIModel3dTilesUrl(iModelId, accessToken);

if (!tilesetUrl) {
  throw new Error("Could not get tileset URL");
}
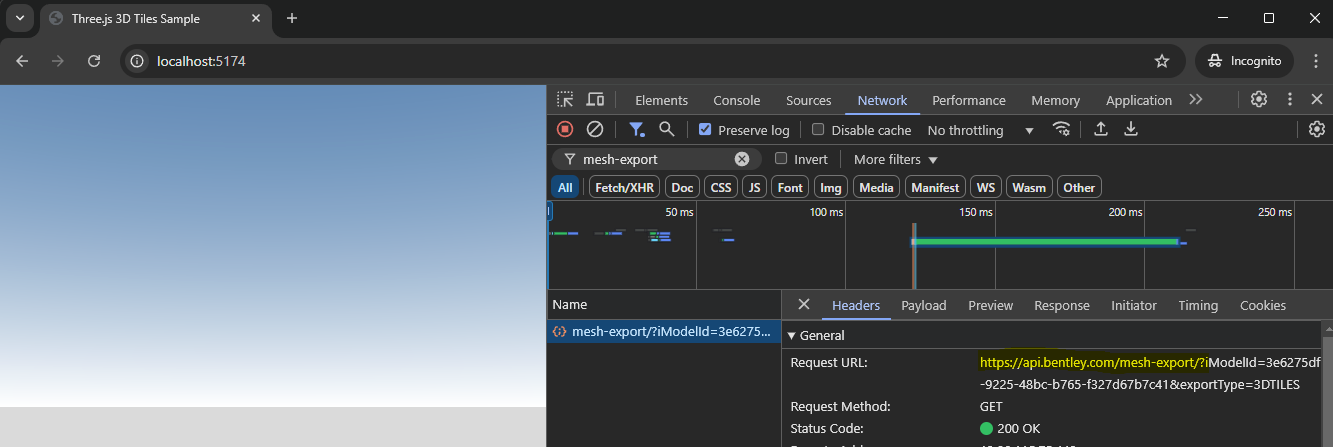
For this code snippet, you also need to set the environment variable VITE_IMODEL_ID to your iModel ID.
You can confirm that the Mesh Export API is being called correctly by checking the network tab in your browser's developer tools. You should see a request to api.bentley.com/mesh-export as shown below.
5. Set up the 3D Tiles Renderer
Now that you have your tileset.json URL, you can set up a TilesRenderer object from the 3DTilesRenderer package. Add the following code to main.ts to add a renderer to your scene, and replace your old render loop with a new one that updates the TilesRenderer.
import { TilesRenderer } from "3d-tiles-renderer";
import { ITwinMeshExportServicePlugin } from "./ITwinMeshExportServicePlugin";

const tilesRenderer = new TilesRenderer(tilesetUrl.toString());
tilesRenderer.registerPlugin(new ITwinMeshExportServicePlugin(tilesetUrl.search));

tilesRenderer.setCamera(camera);
tilesRenderer.setResolutionFromRenderer(camera, renderer);
scene.add(tilesRenderer.group);

function renderLoop() {
  requestAnimationFrame(renderLoop);
  camera.updateMatrixWorld();
  tilesRenderer.update();
  controls.update();
  renderer.render(scene, camera);
}
You will notice there is a class called ITwinMeshExportServicePlugin that is imported and used, and in the next section we will explain how to create it. This is a plugin that customizes your TilesRenderer to handle the authorization requirements of the Mesh Export API. You need to call registerPlugin() and pass in an instance of ITwinMeshExportServicePlugin, with the tileset URL's query parameters passed into its constructor. Those query parameters contain the SAS token which is used to authorize and access the tiles and other resources.
6. Create the ITwinMeshExportServicePlugin
6.1 Add the ITwinMeshExportServicePlugin class
Create a new file called ITwinMeshExportServicePlugin.ts also in your src/ folder, adjacent to main.ts. Add the following code to the file to create the ITwinMeshExportServicePlugin class.
import * as THREE from "three";
import { TilesRenderer } from "3d-tiles-renderer";
import { GLTFLoader } from "three/addons/loaders/GLTFLoader.js";

export class ITwinMeshExportServicePlugin {
  name: string;
  sasToken: string;

  constructor(sasToken: string) {
    this.name = "ITWIN_MESH_EXPORT_SERVICE_PLUGIN";
    this.sasToken = sasToken;
  }
}
This class has two members: its name and the SAS token query parameters passed into the constructor. You can read more about 3DTilesRendererJS plugins in the package's GitHub repository.
6.2 Add appendSearchParams() method
Next, add the following method to the class.
ppendSearchParams(url: string, searchParams: string) {
  const params = new URLSearchParams(searchParams);
  const newUrl = new URL(url);

  for (const [key, value] of params) {
    if (!newUrl.searchParams.get(key)) {
      newUrl.searchParams.append(key, value);
    }
  }

  return newUrl.toString();
}
This method takes a URL and query parameters as a string. It loops through the query parameters and adds them to the URL if it doesn't already contain them.
6.3 Add init() and preprocessURL() methods
Now add the following methods, which make use of appendSearchParams().
init(tiles: TilesRenderer) {
  const manager = new THREE.LoadingManager();
  manager.setURLModifier((url) => {
    return this.appendSearchParams(url, this.sasToken);
  });

  const loader = new GLTFLoader(manager);
  tiles.manager.addHandler(/\.(gltf|glb)$/g, loader);
}

preprocessURL(uri: string) {
  if (/^http/.test(new URL(uri).protocol)) {
    return this.appendSearchParams(uri, this.sasToken);
  }

  return uri;
}
init() is ran when the 3DTilesRenderer is first initialized. In this method, you can create a new three.js loading manager and set it to have a URL modifier which calls appendSearchParams(). You can then then create a new GLTF loader out of this manager, and use addHandler() to tell your TilesRenderer object to use your new loader for files with the .gltf or .glb extensions. This is what tells three.js to add your SAS token query parameters to the texture (or other resource) requests that are made when it's reading the tileset's tiles, which are in the GLTF format.
preprocessURL() is similar to init(). Just like three.js concept of a URL modifier, it is called within the 3DTilesRenderer before resource requests are made from the tileset.json. So this is required to add your SAS token query parameters to tile requests themselves.
With this plugin added, your tileset from the Mesh Export API will be able to properly pass along its SAS token to authorize requests for all its resources.
7. Center and align your tileset for viewing
7.1 Center and align your tileset
The last step is to make sure your tileset is visible to the camera and oriented correctly. Back in main.ts add the following code, which adds an event listener to position the tileset after it loads.
tilesRenderer.addEventListener( "load-tile-set", () => {
  // Tilesets from the Mesh Export API are positioned on earth's surface, like Cesium Ion tilesets.
  // So here we orient it such that up is Y+ and center the model
  // Based on the 3DTilesRendererJS Cesium ion example: https://github.com/NASA-AMMOS/3DTilesRendererJS/blob/master/example/ionExample.js#L78
  const sphere = new THREE.Sphere();
  tilesRenderer.getBoundingSphere(sphere);

  const position = sphere.center.clone();
  // Get distance from origin to the center of the tileset bounding sphere
  const distanceToEllipsoidCenter = position.length();

  // Get the direction of this vector, which should be "up" in the model, as it's sitting on earth's surface
  // Aka surfaceDirection is the surface normal
  const surfaceDirection = position.normalize();
  const up = new THREE.Vector3(0, 1, 0);
  const rotationToNorthPole = rotationBetweenDirections(surfaceDirection, up);

  tilesRenderer.group.quaternion.x = rotationToNorthPole.x;
  tilesRenderer.group.quaternion.y = rotationToNorthPole.y;
  tilesRenderer.group.quaternion.z = rotationToNorthPole.z;
  tilesRenderer.group.quaternion.w = rotationToNorthPole.w;

  tilesRenderer.group.position.y = -distanceToEllipsoidCenter;
});
As the first comment in the code explains, the Mesh Export API produces tilesets that are positioned on the Earth's surface. However, the three.js viewer does not contain a globe like the iTwin or Cesium viewer, so without any transformations the Mesh Export tilesets will be far from the three.js origin and harder to work with.
The first step in this code is to get the center of the tileset's bounding sphere to get its position in space. You can then get the distance from the origin to this position by getting the position vector's length, stored in distanceToEllipsoidCenter. You can also normalize the position to represent the surface direction of the Earth where the model is located-- this can be thought of as which direction is "up" for the orientation of the model, while "up" for three.js is the positive Y axis. You can then get the rotation between these two up directions as a quaternion using the rotationBetweenDirections() function, and set the tileset's quaternion property to it.
7.2 Fill in the rotationBetweenDirections() function
Add this code to define rotationBetweenDirections(). It calculates the rotation between two directions by finding their cross product. All of the centering and rotation code from this step is from the 3DTilesRendererJS Cesium ion example.
function rotationBetweenDirections(dir1: THREE.Vector3, dir2: THREE.Vector3) {
  const rotation = new THREE.Quaternion();
  const a = new THREE.Vector3().crossVectors(dir1, dir2);
  rotation.x = a.x;
  rotation.y = a.y;
  rotation.z = a.z;
  rotation.w = 1 + dir1.clone().dot(dir2);
  rotation.normalize();

  return rotation;
}
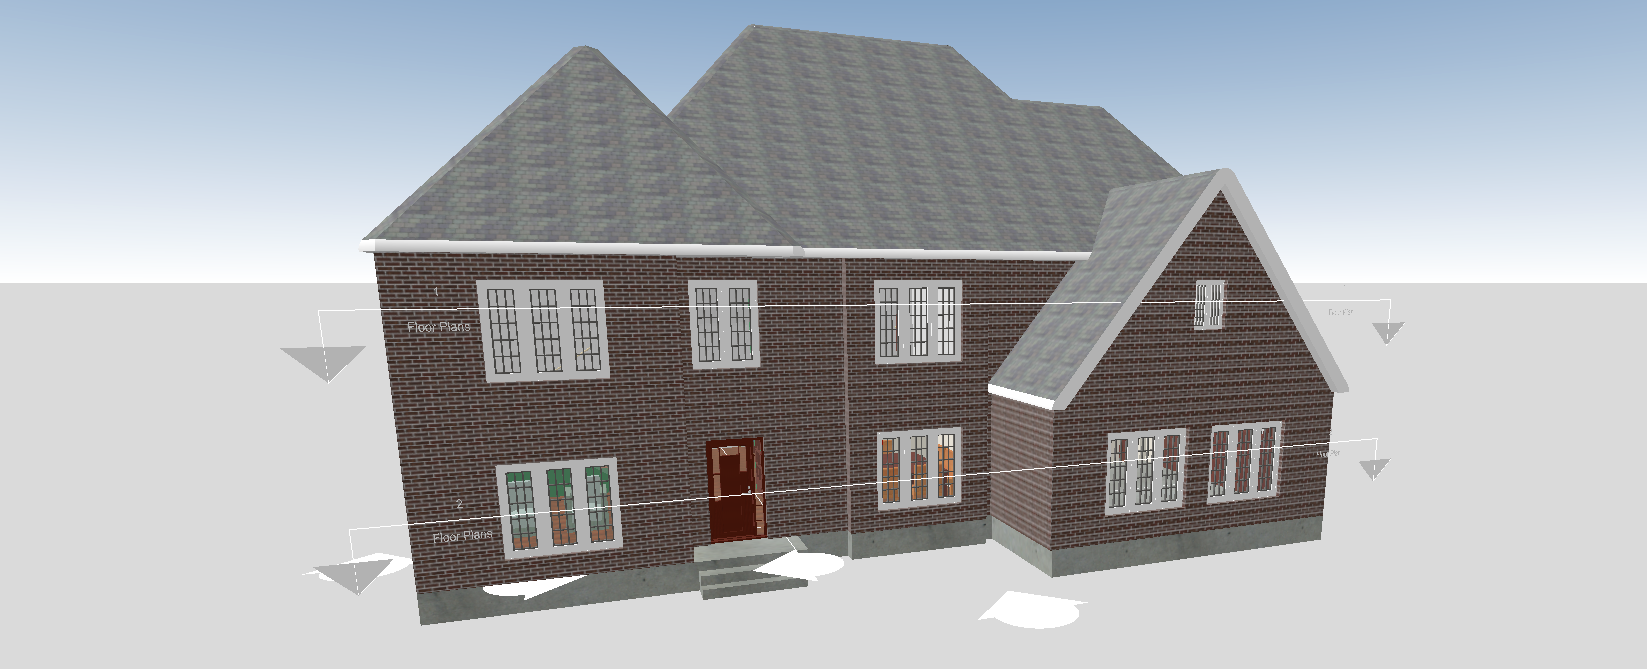
After this step, you should be able to view your tileset!
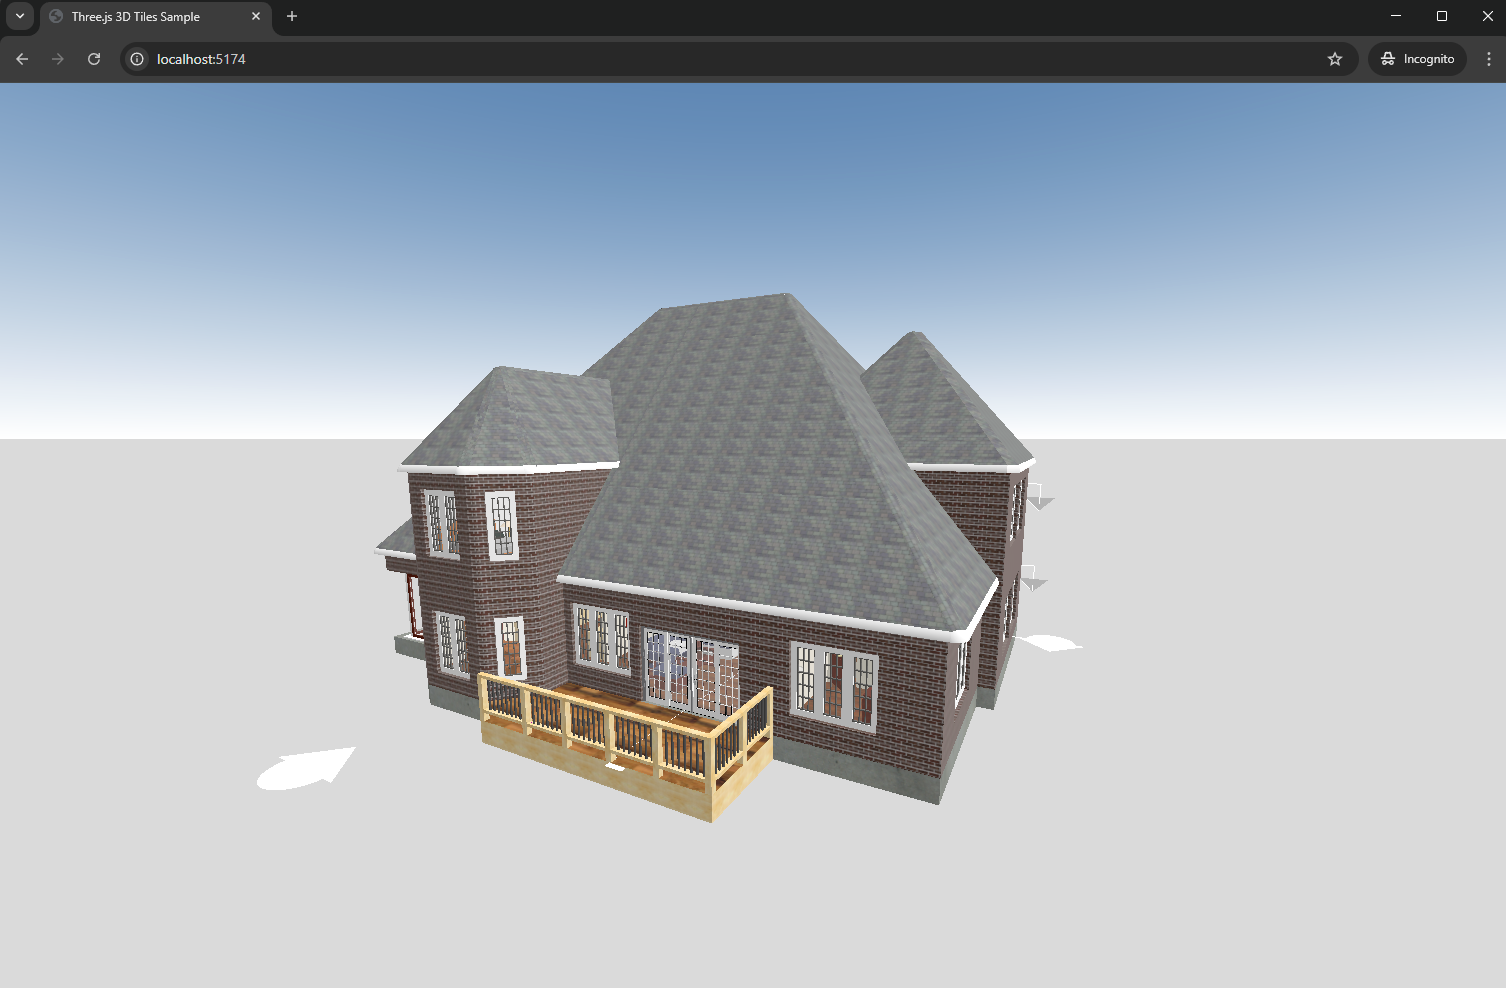
What you've learned
In this tutorial, you learned how to set up a three.js project to view an iModel using the Mesh Export API.
- You started by creating a project using Vite and Typescript.
- You then set up a basic three.js scene with a camera and renderer, and enhanced it with lighting, controls, and a skybox.
- You called the Mesh Export API to retrieve a tileset of your iModel in 3D Tiles format.
- Finally, you used the 3DTilesRenderer package to view it in three.js.
By completing this tutorial, you now have a foundational understanding of using the Mesh Export API to integrate your iModel into a three.js viewer for an interactive 3D visualization! You can now take advantage of any other features of three.js to enhance your viewer further.