Introduction
This tutorial demonstrates how to view an iModel as Cesium 3D Tiles in CesiumJS.
You will learn the following:
- How to set up a CesiumJS viewer
- How to use CesiumJS to get a 3D Tiles tileset for your iModel
- How to view the tileset
To view the source code for the application built in this tutorial, see the 3d-tiles-samples GitHub repository.
Prerequisites
Ensure you meet the following requirements before starting the tutorial:
- Have the iTwin and iModel IDs of iModel you would like to view. You can create an iModel from a Bentley Sample by following the "Create an iTwin" section of the Get Started with the iTwin Platform tutorial.
- Register a single page application to get a client ID. See the "Register your Application" section of the Get Started with the iTwin Platform tutorial.
- Have a Cesium Ion token. You will need to create a free Cesium Ion account, then you can obtain one by following this tutorial.
- Have Node.js (LTS version) installed on your machine.
1. Set up your application
This tutorial uses Vite and Typescript, but you can use Webpack or another build tool, and either Typescript or vanilla Javascript. We will also use this Vite guide and their vanilla-ts template. We will go through the steps of creating the project and installing CesiumJS, but you can also view this CesiumJS quickstart guide and configuring Vite for CesiumJS guide for further details.
1.1 Set up your Vite project
To start off, run this npm create command to initialize a new Vite project using the vanilla-ts template. This will create a new directory with the name imodel-cesium-tutorial and set up a basic Vite project with Typescript. Now cd into your new directory and run npm install.
npm create vite@latest imodel-cesium-tutorial -- --template vanilla-ts
cd imodel-cesium-tutorial
npm install
1.2 Install CesiumJS and configure its static assets
Next, install CesiumJS and the Vite static copy plugin. CesiumJS is a large library that contains many assets, such as images, that need to be copied to your build directory. The Vite static copy plugin will help you do this.
npm install cesium
npm install vite-plugin-static-copy
To configure Cesium with the plugin, create a new file at the root of your project called vite.config.ts with these contents.
import { defineConfig } from "vite";
import { viteStaticCopy } from "vite-plugin-static-copy";

const cesiumSource = "node_modules/cesium/Build/Cesium";
// This is the base url for static files that CesiumJS needs to load
const cesiumBaseUrl = "cesiumStatic";

export default defineConfig({
  define: {
    // Define relative base path in Cesium for loading assets
    CESIUM_BASE_URL: JSON.stringify(`/${cesiumBaseUrl}`),
  },
  plugins: [
    // Copy Cesium Assets, Widgets, and Workers to a static directory
    viteStaticCopy({
      targets: [
        { src: `${cesiumSource}/ThirdParty`, dest: cesiumBaseUrl },
        { src: `${cesiumSource}/Workers`, dest: cesiumBaseUrl },
        { src: `${cesiumSource}/Assets`, dest: cesiumBaseUrl },
        { src: `${cesiumSource}/Widgets`, dest: cesiumBaseUrl },
      ],
    }),
  ],
});
1.3 Start your application
Finally you can use the command npm run dev to start your application. This command runs a script configured in package.json that simply runs vite, which starts the Vite development server. Then navigate to http://localhost:5173 to view your application (which should just show some Vite boilerplate).
2. Create your Cesium viewer
2.1 Prepare your HTML and CSS
First, you need to have a div element in your entry point HTML file to hold your new Cesium viewer. Replace your existing index.html file with the following code, so the viewer can be rendered in the cesiumContainer div.
<!doctype html>
<html lang="en">
  <head>
    <meta charset="UTF-8" />
    <meta name="viewport" content="width=device-width, initial-scale=1.0" />
    <title>iModel Cesium Tutorial</title>
  </head>
  <body>
    <div id="cesiumContainer"></div>
    <script type="module" src="/src/main.ts"></script>
  </body>
</html>
Next, replace the existing CSS from the Vite template in src/style.css with the following code, which simply maximizes the viewer to the full height and width of the browser window.
body {
  margin: 0;
}

#cesiumContainer {
  height: 100vh;
  width: 100%;
}
2.2 Create a basic Cesium viewer
Next, create a new file .env at the root of your project to hold your environment variables. Add your Cesium Ion token to this file in a variable called VITE_ION_TOKEN as shown in the code snippet. All environment variables in Vite must start with VITE_ to be accessible in your code.
VITE_ION_TOKEN={your Cesium Ion token}
Finally, to put it all together, replace your existing src/main.ts file with the following code. This code imports the relevant classes and required CSS from Cesium, gets the Ion token, and initializes a new Cesium viewer in the cesiumContainer div.
import { Ion, Viewer } from "cesium";
import "cesium/Build/Cesium/Widgets/widgets.css";
import "./style.css";

const ionToken = import.meta.env.VITE_ION_TOKEN;

if (!ionToken) {
  throw new Error("Missing required environment variables");
}

// Initialize the Cesium Viewer in the HTML element with the cesiumContainer ID
function setupViewer(): Viewer {
  Ion.defaultAccessToken = ionToken;
  const viewer = new Viewer("cesiumContainer");
  viewer.scene.globe.show = true;
  viewer.scene.debugShowFramesPerSecond = true;
  return viewer;
}

async function main() {
  const viewer = setupViewer();
}

void main();
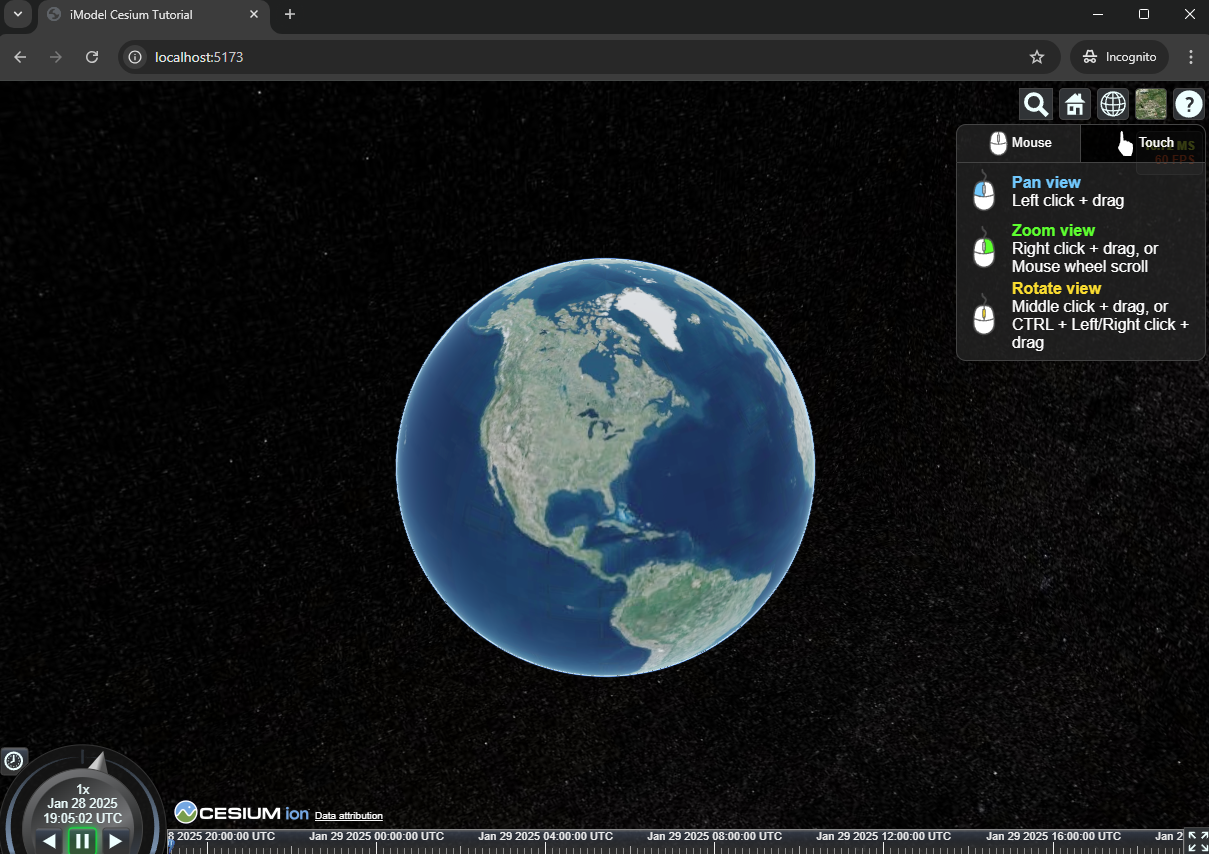
You should now see a Cesium viewer with a beautiful globe!
2.3 Remove Vite template files
At this point, you can safely delete some of the files that were created when you ran the vite create command for your project template. Delete counter.ts and typescript.svg from your src/ directory. At this point it should only contain main.ts, style.css, and vite-env.d.ts.
3. Add iTwin authorization
To authorize Cesium to get your iModel's 3D Tiles tileset, you will need to provide an access token. To get the token, you first need to register your application with the iTwin Platform to obtain a client ID. You can follow this tutorial to learn how to get a client ID.
3.1 Install the iTwin browser authorization package
Once you have a client ID, you can install the @itwin/browser-authorization package with npm. You can learn more about this package and other iTwin authorization clients in their GitHub repository.
npm install @itwin/browser-authorization
3.2 Create a sign-in function
Now add the following code, also to main.ts, to configure your authorization client and allow users to sign into the app. You'll need to set the environment variable VITE_CLIENT_ID to your app's client ID in an .env file at your project's root directory. Make sure you call your signIn() function from main().
import { BrowserAuthorizationClient } from "@itwin/browser-authorization";

const clientId = import.meta.env.VITE_CLIENT_ID;

async function signIn(): Promise<any> {
  const redirectUri = window.location.origin;

  const authClient = new BrowserAuthorizationClient({
    authority: `https://ims.bentley.com`,
    clientId,
    scope: "itwin-platform",
    redirectUri,
    responseType: "code"
  });

  void authClient.signInRedirect();
  await authClient.handleSigninCallback();
  return authClient.getAccessToken();
}

async function main() {
  const viewer = setupViewer();
  const accessToken = await signIn();
}
Another important aspect is the redirectUri property of the auth client. This URI must be present in the redirect URIs setting where you created your app (in the same location where you got your client ID) on developer.bentley.com. For example, if you run your Vite development server on its default port 5173, http://localhost:5173/ must be a redirect URI in your app's settings.
Note: The authorization client is sensitive to the forward slash character
/in your redirect URI. If you encounter an invalid redirect URI error, try adding your URI both with and without the forward slash to your app's settings.
3.3 Set the Cesium ITwinPlatform default access token
Finally, import the ITwinPlatform class from Cesium and set the default access token to the token you get from the signIn() function. Note that the access token returned by our signIn() function includes the "Bearer" prefix, while Cesium's ITwinPlatform.defaultAccessToken expects just the OAuth token with no prefix, so you need to make a small adjustment with accessToken.replace("Bearer ", "").
import { Ion, ITwinData, ITwinPlatform, Viewer } from "cesium";

async function main() {
  const viewer = setupViewer();
  const accessToken = await signIn();
  ITwinPlatform.defaultAccessToken = accessToken.replace("Bearer ", "");
}
You can read more about ITwinPlatform in its CesiumJS documentation.
4. Create your tileset using CesiumJS and add it to the scene
To use CesiumJS to get your tileset, you can use the ITwinData.createTilesetFromIModelId() method to create a 3D Tiles tileset from an iModel ID. This method returns a Cesium3DTileset object that you can add to your viewer's scene with viewer.scene.primitives.add(tileset).
You can read more about ITwinData in its CesiumJS documentation. Internally, this method calls the Mesh Export API to get a tileset for your iModel.
Finally, you can also use viewer.zoomTo(tileset) to zoom the camera to the tileset.
import { Ion, ITwinData, ITwinPlatform, Viewer } from "cesium";

const iModelId = import.meta.env.VITE_IMODEL_ID;

async function main() {
  const viewer = setupViewer();
  const accessToken = await signIn();
  ITwinPlatform.defaultAccessToken = accessToken.replace("Bearer ", "");

  const tileset = await ITwinData.createTilesetFromIModelId(iModelId);
  viewer.scene.primitives.add(tileset);
  if (tileset)
    await viewer.zoomTo(tileset);
}
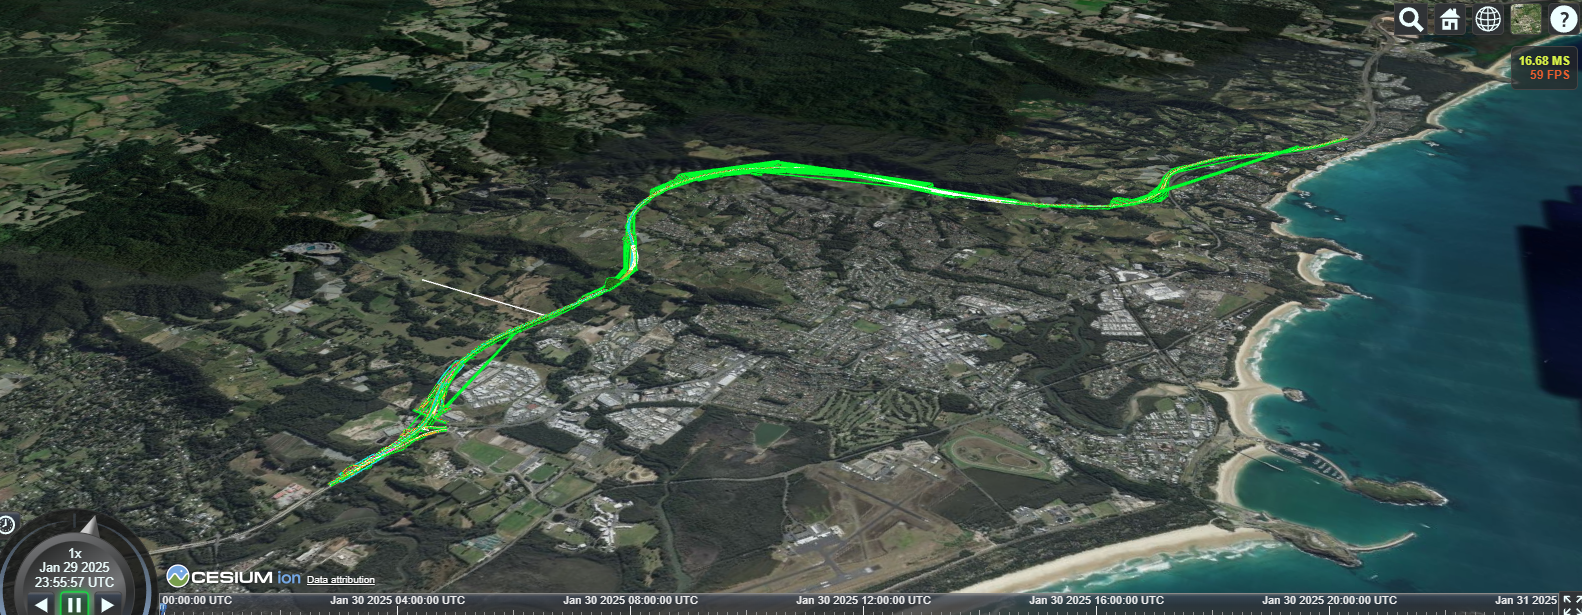
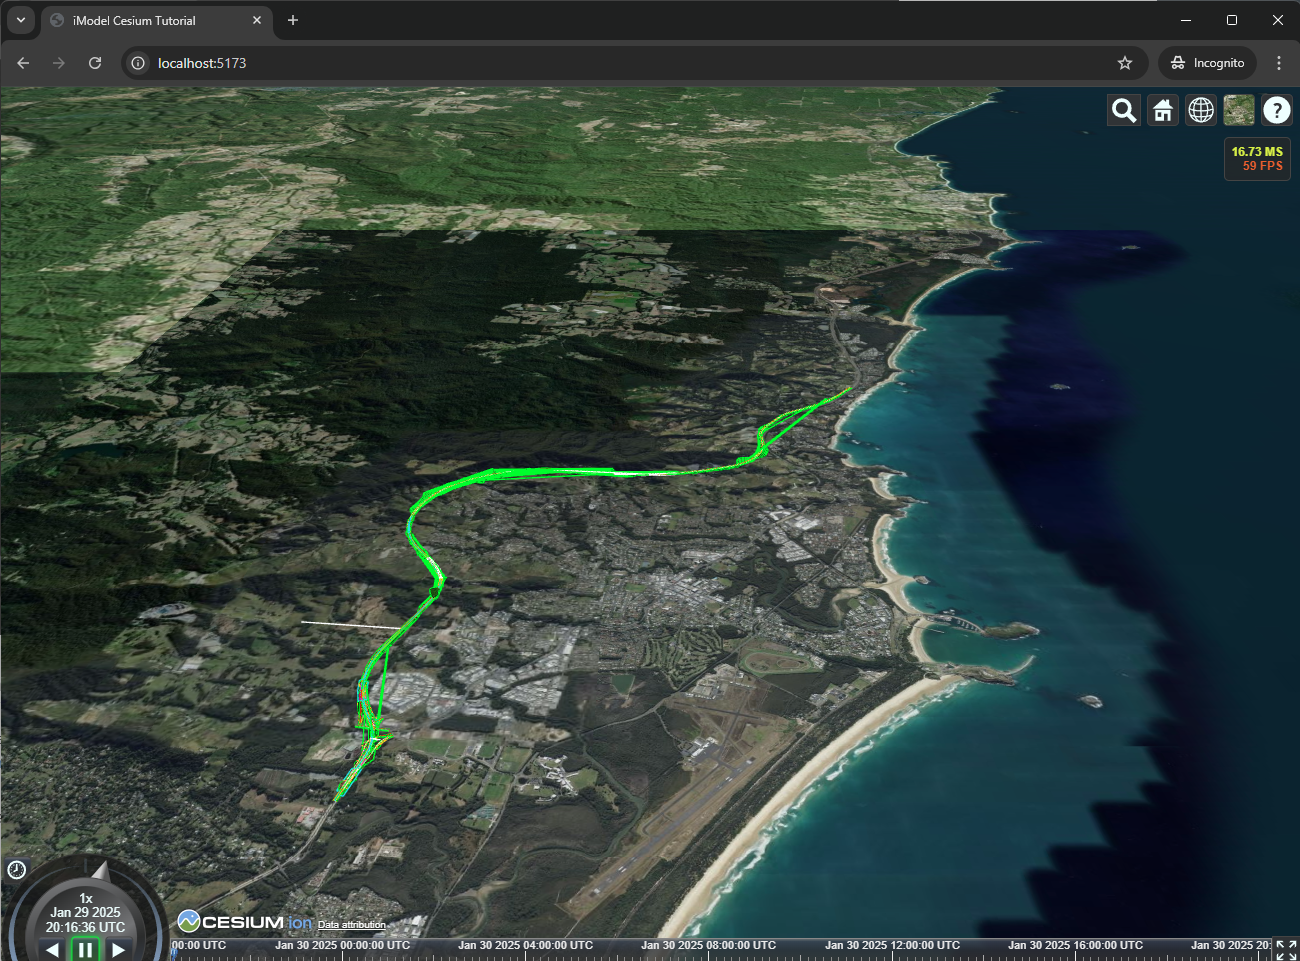
After this, you should see your iModel in your Cesium viewer! If your iModel is geolocated, it should be placed in the correct location on the globe. If not, it will appear in the ocean at zero degrees latitude and zero longitude.
What you've learned
In this tutorial, you learned how to set up a CesiumJS project to view an iModel using Cesium functions.
- You started by creating a project using Vite and Typescript.
- You then set up a basic Cesium viewer.
- You added iTwin authorization to your project.
- You used Cesium functions to create a 3D Tiles tileset of your iModel and added it to the viewer.
By completing this tutorial, you now have a foundational understanding of integrating your iModel into Cesium for an interactive 3D visualization! Please also check out this interactive Cesium sandcastle.