Introduction
Before you can start using iTwin Platform REST APIs you need to create an application. Registered application gives you an ability to access iTwin Platform REST APIs and manage client accesses (scopes). This tutorial covers basic application registration and modification steps.
Info
Skill level:
Basic
Duration:
15 minutes
1. Sign in or sign up for a Bentley account
Before you register your first application you need to have a Bentley account to Sign In to iTwin Platform Portal. Only signed-in users can create, view, edit or delete applications.
1.1 Create your Bentley account
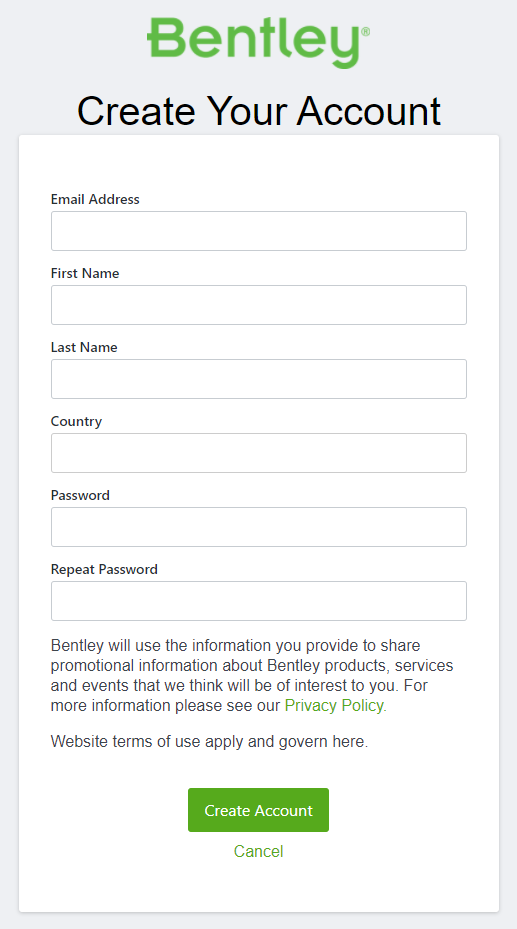
If you don't have a Bentley account yet, you can create one by following these steps:
- Go to https://developer.bentley.com
- Click the Sign In button. You will be redirected to Sign In page
- Click Don't have an account? Register now link. You will be redirected to account registration page
- Fill in the appropriate information for each of the text boxes
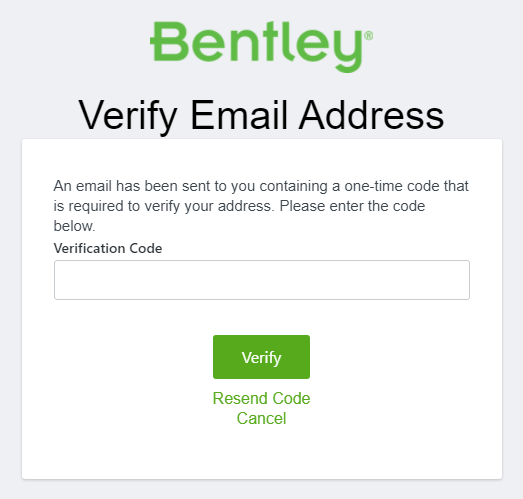
- When the form is complete, click Create Account. You will be redirected to email verification page
- Enter Verification Code. You should receive an email from
no-reply@bentley.comto address you entered in registration form with Verification Code - Click Verify
Now you can Sign-in using your newly created Bentley account credentials.
Create Your Account form
Email Address verification
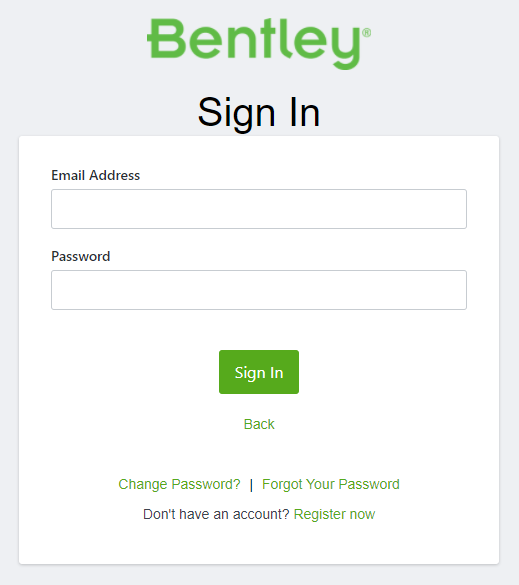
1.2 Sign in
To Sign In to iTwin Platform Portal you need to:
- Go to https://developer.bentley.com
- Click the Sign In button. You will be redirected to Sign In page
- Sign-in using your Bentley account credentials
Sign in page
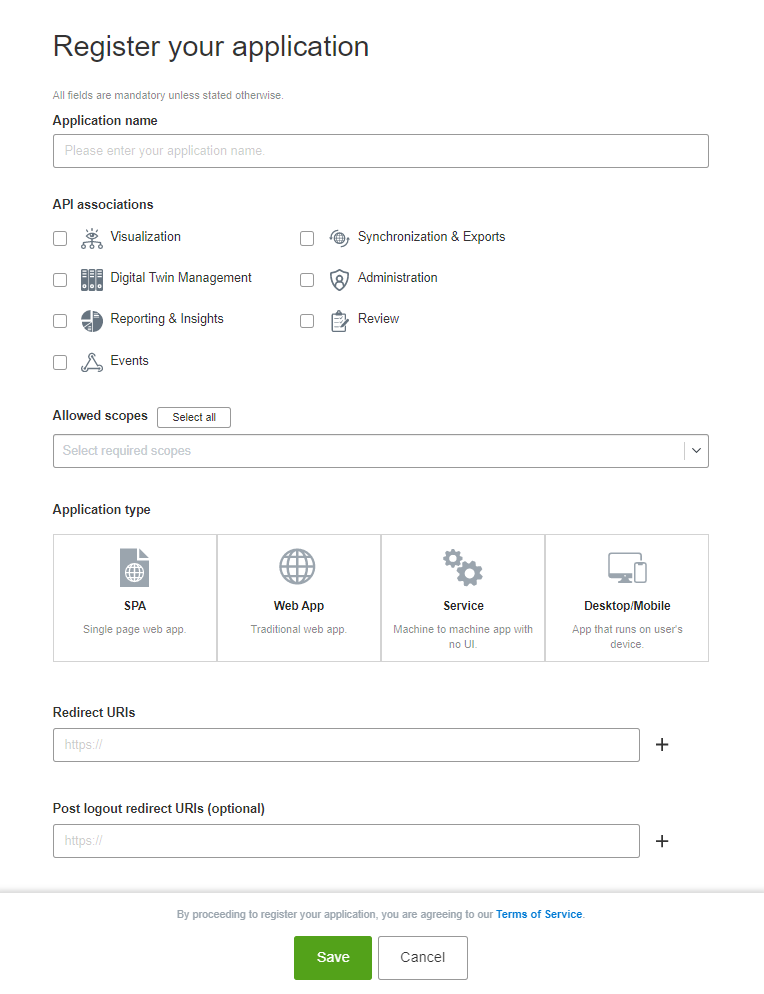
2. Register an application
Before you can start using iTwin Platform REST APIs you need to create an application. Registered application gives you an ability to access iTwin Platform REST APIs and manage client accesses (scopes).
To register an application follow these instructions:
-
Go to the My Apps page
-
Click the + Register New to open new application registration form
-
Give your application a Name
-
Select API associations you are going to use
- API association represents set of APIs. Full list of API associations with their APIs you can find on iTwin Platform Documentation page.
- Each API endpoint requires certain OAuth scopes. When you select API associations that your application will use, registration form will allow you to chose scopes that are available in these associations.
-
Change the scope list to give your application appropriate accesses
- Make sure you selected correct API associations. You will see only a set of scopes from selected API associations.
-
Select your Application type (SPA, Web App, Service or Desktop/Mobile)
-
Single Page Application (SPA) is a web application that runs in a browser and does not require the page to be reloaded.
-
Web App is a traditional web application where every change involves a new request for the server to provide an HTML page.
-
Service represents an automated service with no human interaction.
-
Desktop/Mobile is an application that runs on a desktop computer or mobile device.
-
-
Enter Redirect URIs
- Redirect URI specifies the location where the authorization server can send the user once the application has been successfully authorized.
- If you create your application to complete some other tutorial, you can use
http://localhost:3000/signin-callbackas a Redirect URI.
-
Enter Post logout redirect URIs (Optional)
- Post logout redirect URI specifies the location where the authorization server can send the user after a logout.
- If you create your application to complete some other tutorial, you can leave Post logout redirect URIs empty.
-
Please review and acknowledge the Terms of Service. By proceeding to register your application, you agree to our Terms of Service
-
Click Save to submit application creation
Application registration form
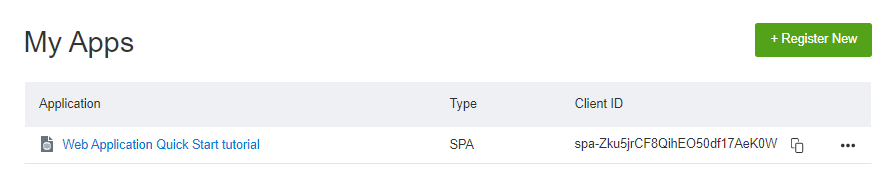
3. View an application
Now that you have registered an application, you can see it in My Apps table on My Apps page. To see all application details:
- Go to My Apps page
- Find application in a table
- Click on its title link. You will navigate to selected application details page.
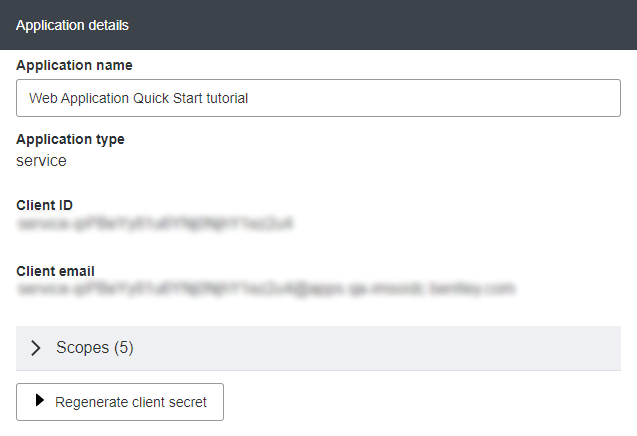
This page has all information about your application:
- Application name - A human-readable name for your application.
- Application type - Type of your application. Cannot be changed.
- Client ID - A unique identifier for your application.
- Client email (only for Service applications) - fake user email, created for role assignment.
- Scopes - list of accesses granted to the application.
- Redirect URIs (only for SPA, Web App, Desktop/Mobile applications) - the list of locations where the authorization server can send the user once the application has been successfully authorized.
- Post logout redirect URIs (only for SPA, Web App, Desktop/Mobile applications) - the list of locations where the authorization server can send the user after a logout.
- Regenerate client secret button (only for Service and Web App applications) - a control to regenerate Client Secret if the one given during application registration was missed.
- Owners - list of users that can view, edit or delete this application.
- API associations - list of APIs that can be used by your application.
My Apps table
Application details page

4. Edit an application
As an owner of application you can easily change it anytime. To edit an application you need to:
- Go to My Apps page
- Find application in a table
- Click on its title link. You will navigate to selected application details page
Application details that can be changed:
- Application name - A human-readable name for your application.
- Redirect URIs (only for SPA, Web App, Desktop/Mobile applications) - the list of locations where the authorization server can send the user once the application has been successfully authorized.
- Post logout redirect URIs (only for SPA, Web App, Desktop/Mobile applications) - the list of locations where the authorization server can send the user after a logout.
- Owners - list of users that can view, edit or delete this application.
- API associations - list of APIs that can be used by your application.
- Scopes - list of accesses granted to the application.
Application name, Redirect URIs, Post logout redirect URIs can be simply changed by editing their content or adding additional values (for URIs) and clicking Save button, but other properties require more manipulations.
4.1 Adding or removing APIs
To add or remove API in API associations list, follow these instructions:
- Scroll down to API associations card
- Click Add APIs button
- You will see a modal window with list of API groups.
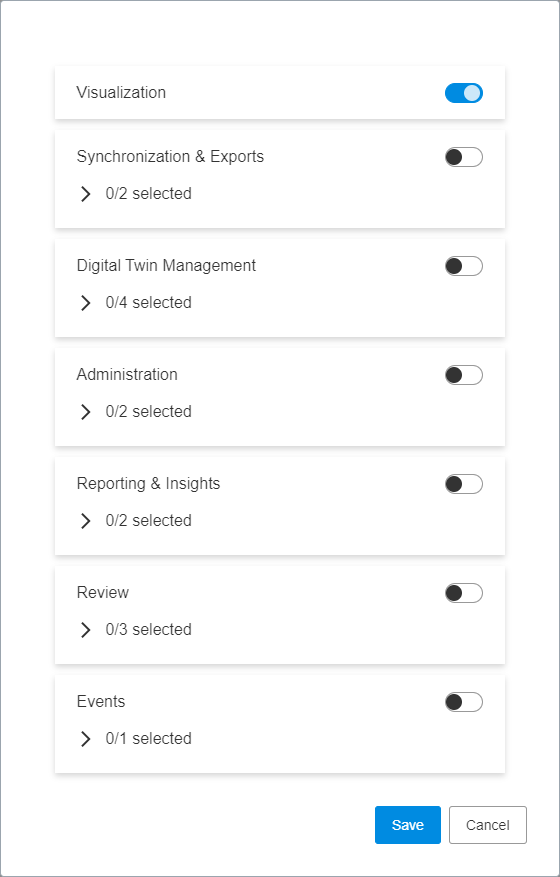
- Select APIs you want to add by toggling them ON
- Some API groups have more than one API. If you want to select single APIs from group - expand the API list and toggle each API separately.
- Select APIs you want to remove by toggling them OFF
- Click Save
- Now you can see that your API associations list has changed and all APIs you have selected are in the list.
- At this point your changes are not submitted yet. If you refresh the page - changes won't be saved.
- To submit your changes (if any have been made) you need to click Save button at the bottom of the page
- The success toast message will inform that your changes were successfully saved.
API associations card
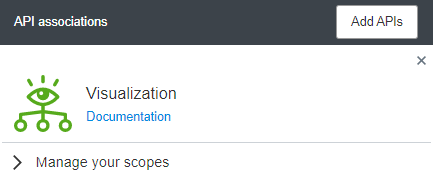
Add APIs dialog
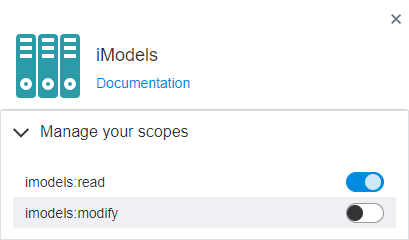
4.2 Changing scopes
Each API in your API associations list has it's own list of scopes that can be changed. To manage API scopes that are assigned to your app, follow these instructions:
- Scroll down to API associations card
- Find API for which you want to manage scopes
- Expand Manage your scopes of selected API
- Toggle ON scopes you want to be granted to your application
- Toggle OFF scopes you do not want to be granted to your application
- To submit your changes (if any have been made) you need to click Save button at the bottom of the page
- The success toast message will inform that your changes were successfully saved.
After successful save you can see that your scope list have changed and all scopes you selected are in the list.
Expanded "Manage your scopes"
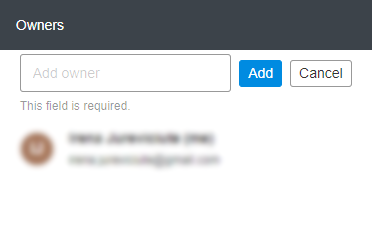
4.3 Managing application Owners
You can add users with Bentley account as an owners of your application. This will allow them to see, edit or delete your application.
Add application owner
To add an additional owner, follow these instructions:
- Click Add owner button. You will get an input for typing an email address
- Type in an email of user you want to share ownership with
- Click Add
- The toast message will inform that user is being added to owners list.
After success toast message you will see that user is now added to application owners list. Now user, who was added to owners list should see your application on My Apps page.
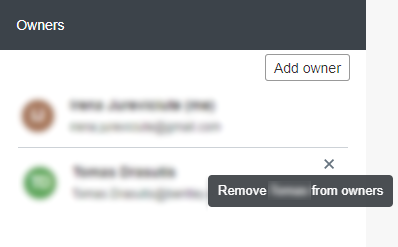
Remove application owner
To remove an additional owner, follow these instructions:
- Click x (cross) button near user you want to remove from owners list
- The toast message will inform that user is being removed from owners list.
After success toast message you will see that user is now removed from application owners list. Now user, who was removed from owners list won't see your application on My Apps page anymore.
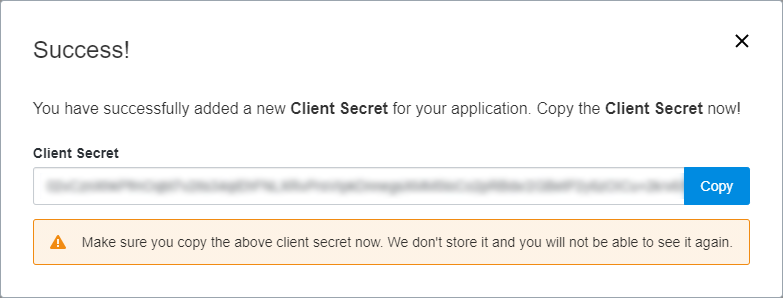
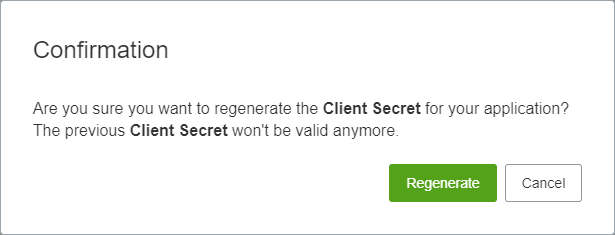
4.4 Regenerating Client Secret (only for Service and Web App applications)
If you missed your Client Secret you can always regenerate it.
To regenerate Client Secret:
- Click Regenerate client secret button
- In Confirmation dialog click Regenerate
- Wait for Client Secret regeneration process completion
- In Success! dialog you will see new Client Secret
Make sure you copy and save your new Client Secret. We don't store it and you will not be able to see it again.
Application details with "Regenerate client secret" button
Client Secret regeneration confirmation dialog
New Client Secret