Introduction
This tutorial guides you through creating a new iOS app using the iTwin Mobile SDK for iOS. In this walk-through you will be introduced to the iTwin Mobile SDK for iOS using Swift Package Manager and the SwiftUI sample app.
By the end of this tutorial, you will have the iTwin sample app for iOS running on your iPad or iPhone.
Note: You must use a Mac capable of running Xcode 13 to complete this tutorial. If using an Intel Mac, you have the option to run the sample app in the Simulator. If using an Apple Silicon Mac, use a physical device to run the sample app.
Info
Skill level:
Basic
Duration:
30 minutes
1. Set up your environment
Before you start this walk-through, download and install the following software on your Mac.
1.1 Required materials
Xcode is the development environment you will use for building iOS and macOS apps. Download it from the AppStore. Start Xcode after you install it and allow it to install additional components.
This tool provides the backend JavaScript runtime necessary for your computer to read and render code appropriately. It also allows you to run NPM commands at the terminal.
This is the source code control system for the iTwin Mobile SDK sample repository.
1.2 Suggested tools
This is our recommended editor and debugger tool for developing iTwin.js applications. It is free, open source and includes a GUI for working with GIT.
Note: Optionally, install the
codecommand in yourPATHby running theinstall 'code' command in PATHcommand at the command palette in VSCode.
2. Register an application
To begin, register a new client on the iTwin platform developer portal. Once the new client is registered, you are ready to start building your app.
Sign in
To register an application you need to be signed in. If you are not already, you can do that by clicking the Sign In button in the action pane or in the top right corner of the page.
Register a Native Application
All apps connecting to and sending data through the platform must be registered on your account. Use the Register application button to automatically create your first Native Application. This allows you to configure authentication for your app. For more information, see Authorization Code Flow for your Native Application.
Once the client is generated, a few lines of code are displayed; note these lines. You will add these to the Xcode config file in a later step.
- ITMAPPLICATION_CLIENT_ID - This is the unique identifier for your application. It is displayed on the application details page as Client ID.
- ITMAPPLICATION_SCOPE - List of accesses granted to the application. Displayed on the application details page as Scopes.
For future reference: Register and configure your application manually following the instructions in the Register and modify an Application tutorial. Ensure that you select an Application type of Desktop/Mobile.
3. Clone the sample repository
Clone the repository to follow along with this tutorial. In your Terminal, enter cd ~/Desktop, then run git clone https://github.com/iTwin/mobile-samples.git.
Next, open the mobile-samples folder in VS Code.
Note: If you have the
codecommand installed in your path, you can entercode mobile-samplesin your Terminal.
git clone https://github.com/iTwin/mobile-samples.gitcode mobile-samples3.1 Directory structure
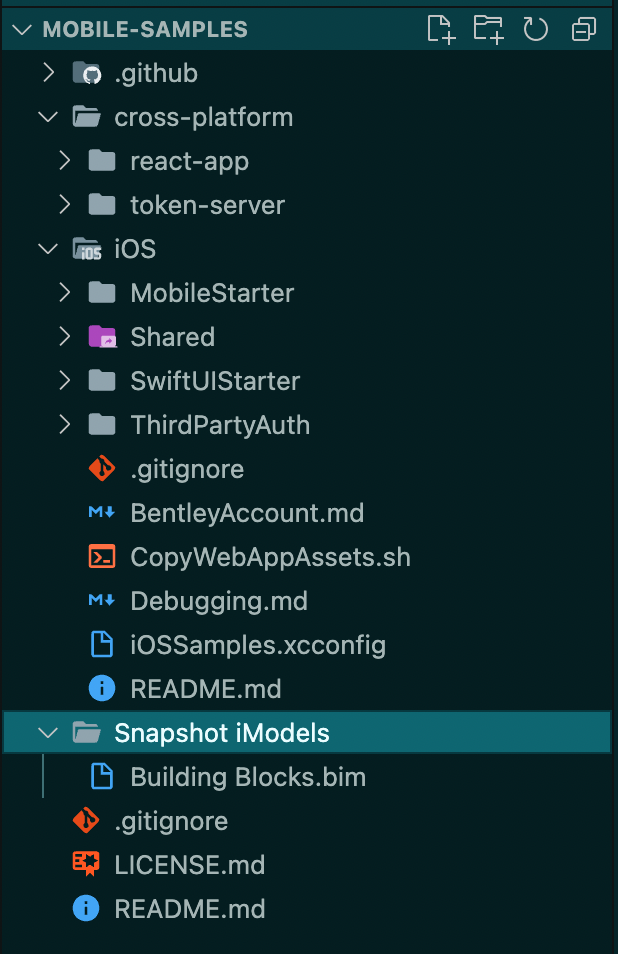
This section gives a high-level description of the top-level folders in the sample app.
The iOS directory contains all of the code that is specific to the iOS platform. This includes Xcode projects for the Getting Started samples based on SwiftUI (SwiftUIStarter) and UIKit (MobileStarter), and variations that can target local builds of the SDK that can be used for SDK development (PRs are very welcome). The Shared directory contains utility files that are used in multiple sample apps. Finally, there are additional sample apps to help you get up and running.
The cross-platform directory contains the react-app containing all of the user interface code in the sample app. The other directories in cross-platform are not used in this sample.
Finally, the Snapshot iModels directory contains an iModel that you can use when running your sample.
4. Xcode
Finally, we're ready to start diving into the code!
4.1 UI framework
Feel free to choose the project for the UI framework that you prefer. We will be using the SwiftUI starter in this tutorial. If you chose to use UIKit, substitute MobileStarter in all cases throughout the rest of the tutorial.
Note: All of the app UI in this sample project is written in React, but the iTwin Model Viewer runs in a
WKWebViewand can be integrated into any app.
UIKit
If you prefer to work with UIKit, open iOS/MobileStarter/MobileStarter.xcodeproj
SwiftUI
If you prefer to work with SwiftUI, open iOS/SwiftUIStarter/SwiftUIStarter.xcodeproj
open iOS/MobileStarter/MobileStarter.xcodeprojopen iOS/SwiftUIStarter/SwiftUIStarter.xcodeproj4.2 Swift Package Manager
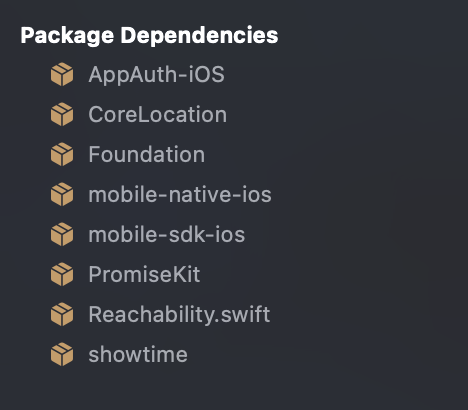
Swift Package Manager (SPM) downloads several packages as soon as you open the sample. This should only take a couple of minutes, depending on your network speed. Wait for this to finish, then click the project name in the Project navigator.
NOTE: You might encounter an error during Swift Package installation or later when you try to run the app. If so, choose File > Packages > Reset Package Caches in the Xcode menu.
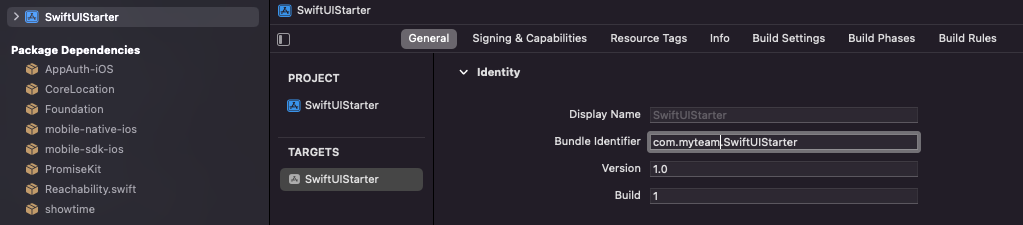
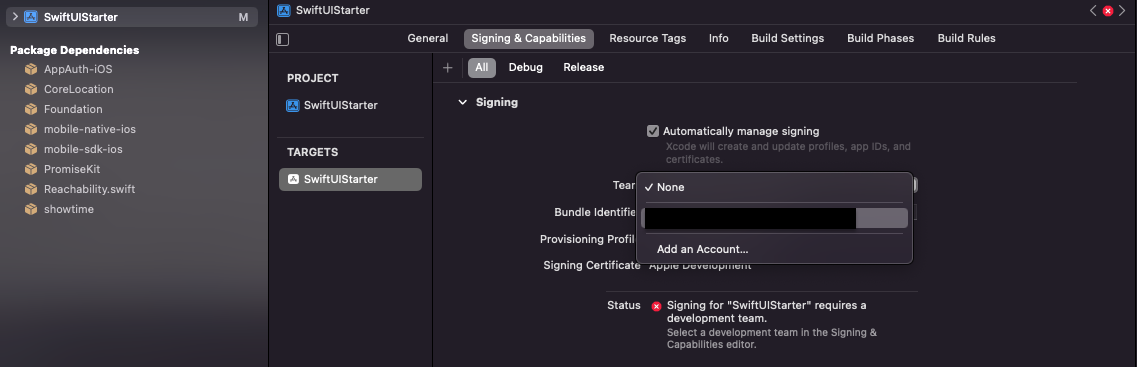
4.3 Target configuration
Select SwiftUIStarter in the Project Navigator, then select the SwiftUIStarter target in the Targets section. Change the Bundle Identifier to com.<myteam>.SwiftUIStarter, replacing <myteam> with your actual team name.
Next, switch to the Signing & Capabilities tab and select your development team from the dropdown.
4.4 Xcconfig
The last thing to do before switching over to VSCode is to create a file called ITMApplication.xcconfig in the iOS/ directory. Copy the ITMAPPLICATION_CLIENT_ID and ITMAPPLICATION_SCOPE code block from the Register a Native Application section above and paste it into this file.
touch iOS/ITMApplication.xcconfig5. NPM Install
iTwin.js apps are built using JavaScript, and in order to build and run that side of the codebase, you'll need to install some dependencies. You should have installed the latest LTS version of Node.js back when you were setting up your environment. Go back and do that now if you skipped that step.
Note: If you're using an Apple Silicon Mac, you'll need to use a Rosetta 2 terminal for this step. Once the install is done you don't need Rosetta again.
cdintocross-platform/react-app- Run
npm install - Run
npm run build - Run
npm start
Note: The
npm startcommand starts a debug server on your Mac that the iOS app will communicate with. This allows you to debug the JavaScript code using Safari's Web Inspector. This means that your device needs to be on the same local network as your Mac, and your Mac must not block incoming connections from the local network. In order to run a production-like build, uncommentITMAPPLICATION_NO_DEBUG_SERVER = YESiniOSSamples.xcconfig. Note that if you do this you will not be able to use Safari to debug the JavaScript code.
cd cross-platform/react-app
npm install
npm run build
npm start
6. Run the app
Now that the React app is built and the debug server is running, or you've uncommented ITMAPPLICATION_NO_DEBUG_SERVER = YES in iOSSamples.xcconfig, it's time to go back to Xcode.
If you've followed along with the steps in Section 4, you should be able to simply select your device from the Devices dropdown and run the app (⌘ R).
Reminder: If you see errors that mention Package resolution, choose File > Packages > Reset Package Caches then try to run the app again.
Note: You may encounter an error dialog that says
Could not connect to React debug server.If you see this error, uncommentITMAPPLICATION_USE_IP = YESiniOSSamples.xcconfigand try launching the app again.
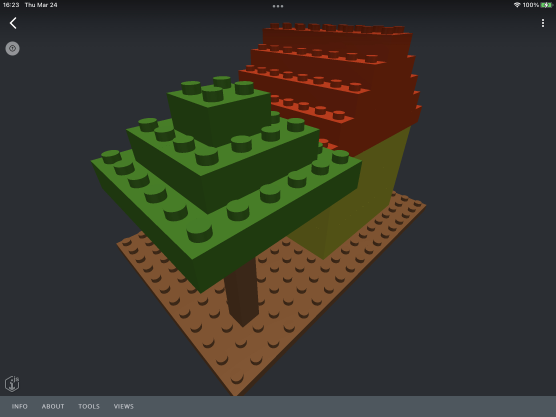
Once the app is running, you have two ways to open and view an iModel.
The first, and easiest, way is to tap Hub iModels and open an iModel directly from the iModel Hub. However, this does require that you have access to a project with an iModel.
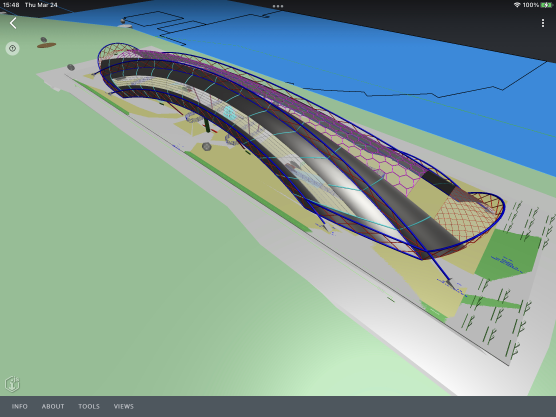
The other way is to open a snapshot iModel that is loaded onto your device. A simple snapshot iModel is included in the repository at Snapshot iModels/Building Blocks.bim. You can copy this onto your device using Finder and then use the Snapshot iModels button to open it in the iTwin Sample app.
Conclusion
In this tutorial, you learned how to create a new iTwin mobile client, how an iTwin mobile app is divided between native code and React code, and how to load and view an iModel on your device.
Was this page helpful?