Authorize Web Application

Introduction

In this tutorial you will create a Web Application, learn how authorization code flow works with Secret, and how to get an access token with it. In the end we will double check if the token is truly valid by making a request to one of the iTwin Platform API endpoints.

Info

Skill level:

Basic

Duration:

10 minutes

1. Register a Web Application

A Web Application is an application which runs on web system such as Android, Windows, iOS and etc.

To be able to register an application you need to be signed in. If you are not already you can do that by clicking the Sign In button in the action pane or in the top right corner of the page.

You will need to register an application to use the iTwin Platform APIs. You can use the Register Application button to automatically create your first Web Application. This will allow you to configure Authorization Code Flow for your Web Application and get the correct access token.

Once generated, you will be shown a few lines of code under the button:

  • client_id - This is the unique identifier for your application. It is displayed on the application details page as Client ID.
  • redirectUris - Specifies where users are redirected after they have chosen whether or not to authenticate your app. Displayed on the application details page as one of Redirect URIs.
  • scope - List of accesses granted to the application. Displayed on the application details page as Scopes.
  • client_secret: Secret that was created and shown first time you created an application.

For future use: Register and configure your application manually following the instructions in the Register and modify an Application tutorial.

2. Get an Access Token

An Access Token is token which contains a string that can be used to make authenticated requests to an API to access protect resources (in this case iTwin Platform APIs).The string has no meaning to the application using it, but represents that the user has authorized the application to access their account. The token is bounded by an appropriate lifetime, scopes, and other information that the server may require.

This flow provides a way to authorize by redirecting to the Authorize endpoint, getting a code back, and exchanging it for an access token in a subsequent call.

You can find more information here, but it is more technical.

For this tutorial purposes we will split Application into two parts Frontend (UI stuff, that runs on user machine) and Backend (that runs inside server).

Steps to get an access token using this flow:

  1. Frontend navigates to authorization server.
  2. Authorization server redirects back to your application (one of redirect URIs) with code query parameter.
  3. Frontend part sends code to Backend.
  4. Backend exchanges code for an access_token via the Token endpoint.
  5. Backend sends access_token back to Frontend. (And keeps refresh token for himself)

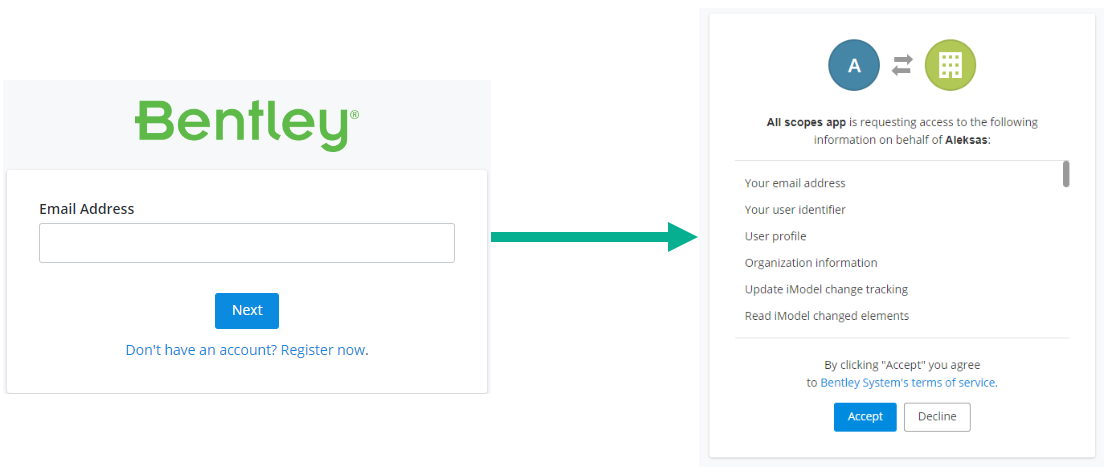
Application should open browser to allow user interact with authorization server. This allow user to authorize agents authorization server and give consent to allow access part of his data through your application. If you follow the interactive part you can click the Navigate button and it will open popup window that will hit authorization endpoint with required query parameters.

The URL will be built in this way:

Authorization endpoint: https://ims.bentley.com/connect/authorize

Web Applications can ask for offline_access scope. This will indicate that you want to receive a refresh_token which can be used to generate new access tokens without user interaction.

With query parameters:

  • client_id - This is the unique identifier for your application. Displayed on the application details page as Client ID (e.g. webapp-example).
  • redirect_uri - Specifies where you want to go back after successful authorization (e.g. http://localhost:3000/redirect).
  • scope - List of accesses granted to the application. Displayed on the application details page as Scopes (e.g. users:read).
  • response_type - For this flow code is the only option and it indicates that you will get code as a query parameter when the user will come back from the authorization server.

So in the end it should look something like this: https://ims.bentley.com/connect/authorize?client_id=CLIENT_ID&redirect_uri=http%3A%2F%2Flocalhost%3A3000&scope=users%3Aread+offline_access&response_type=code

Navigate to the Authorization Server


TEXT
https://ims.bentley.com/connect/authorize?client_id=CLIENT_ID&redirect_uri=http%3A%2F%2Flocalhost%3A3000&scope=users%3Aread+offline_access&response_type=code

The code will be placed inside the redirect URL query parameter (e.g. http://localhost:3000/redirect?code=random-string). The application should take care of code query parameter extraction. If you follow the interactive steps the code should appear in the action pane.


You need to call the token endpoint with the Content-Type header equal to application/x-www-form-urlencoded.

Request body (with URL encoded characters):

  • client_id: Identification that is generated when the application is created. You can find it in the My Apps page. If you generated it during this tutorial you can find it in the first step.
  • client_secret: Secret that was created and shown first time you created an application.
  • grant_type: authorization_code indicates that the application will use a code to get an access_token.
  • code: Code that the application got after the redirect from the authorization server back to the application itself.
  • redirect_uri: redirect URI there was code send.
Code is short lived: If your code has expired please Navigate to the authorization server one more time.

Request to Token endpoint


HTTP
POST https://ims.bentley.com/connect/token HTTP/1.1
Content-Type: application/x-www-form-urlencoded

client_id=CLIENT_ID&client_secret=CLIENT_SECRET&grant_type=authorization_code&code=CODE&redirect_uri=http%3A%2F%2Flocalhost%3A3000

Response contains:

  • token_type: Bearer. This is part of the Authorization header that is constructed like Authorize: token_type access_token. You can read more here.
  • access_token: Access token itself (in JWT format) that will be passed in the Authorize header for API calls as Bearer JWT_TOKEN.
  • refresh_token: Token that allows getting a new access token without user interaction.
  • expires_in: Lifespan of the access token in seconds.

Response from the Token endpoint


JSON
{
  "access_token": "JWT_TOKEN",
  "refresh_token": "REFRESH_TOKEN",
  "token_type": "Bearer",
  "expires_in": 3599
}

You need to call the token endpoint with the Content-Type header equal to application/x-www-form-urlencoded.

Request body (with URL encoded characters):

  • client_id: Identification that is generated when the application is created. You can find it in the My Apps page. If you generated it during this tutorial you can find it in the first step.
  • client_secret: Secret that was created and shown first time you created an application.
  • grant_type: refresh_token indicates that the application will use refresh_token to get access_token.
  • refresh_token: refresh_token token itself that you got from the last request to the Token endpoint.

Refresh Token


HTTP
POST https://ims.bentley.com/connect/token HTTP/1.1
Content-Type: application/x-www-form-urlencoded

client_id=CLIENT_ID&client_secret=CLIENT_SECRET&grant_type=refresh_token&refresh_token=REFRESH_TOKEN

Response contains:

  • token_type: Bearer. This is part of the Authorization header that is constructed like Authorize: token_type access_token. You can read more here.
  • access_token: Access token itself (in JWT format) that will be passed in the Authorize header for API calls as Bearer JWT_TOKEN.
  • refresh_token: Token that allows you to get a new access token without user interaction.
  • expires_in: Lifespan of the access token in seconds.

Response from /users/me endpoint


JSON
{
    "access_token": "JWT_TOKEN",
    "refresh_token": "REFRESH_TOKEN",
    "token_type": "Bearer",
    "expires_in": 3599
}

This request will show that the newly created access token is valid and how to use it. The /users/me endpoint will retrieve the logged in user’s profile information. If you follow the interactive part you can click the Send request button.

Request to /users/me endpoint


HTTP
GET https://api.bentley.com/users/me HTTP/1.1
Authorization: Bearer JWT_TOKEN
Accept: application/vnd.bentley.itwin-platform.v1+json

This request will return user information (name, email, country and etc.).

Response from /users/me endpoint


JSON
{
  "user": {
    "displayName": "FirstName LastName",
    "givenName": "FirstName",
    "surname": "LastName",
    "email": "FirstName.LastName@domain.com",
    "alternateEmail": "FirstName.LastName@alternative.com",
    "city": "CityName",
    "country": "US",
    "language": "EN",
    "createdDateTime": "2021-08-27T10:19:07.2510000Z"
  }
}